

How to make the front page of a cross-border EC site multilingual in 10 minutes with Shopify

Shopify offers a way to make your site multilingual. But the standard admin feature doesn’t have that capability and you need to install a translation app at this time.
In this article, I will show you how to use the app to make the front page of the store multilingual. I think that the work time is about 10 minutes because it is very easy.
About a multilingual store used in this article
The following English store exist. I will make the front page of this site multilingual.
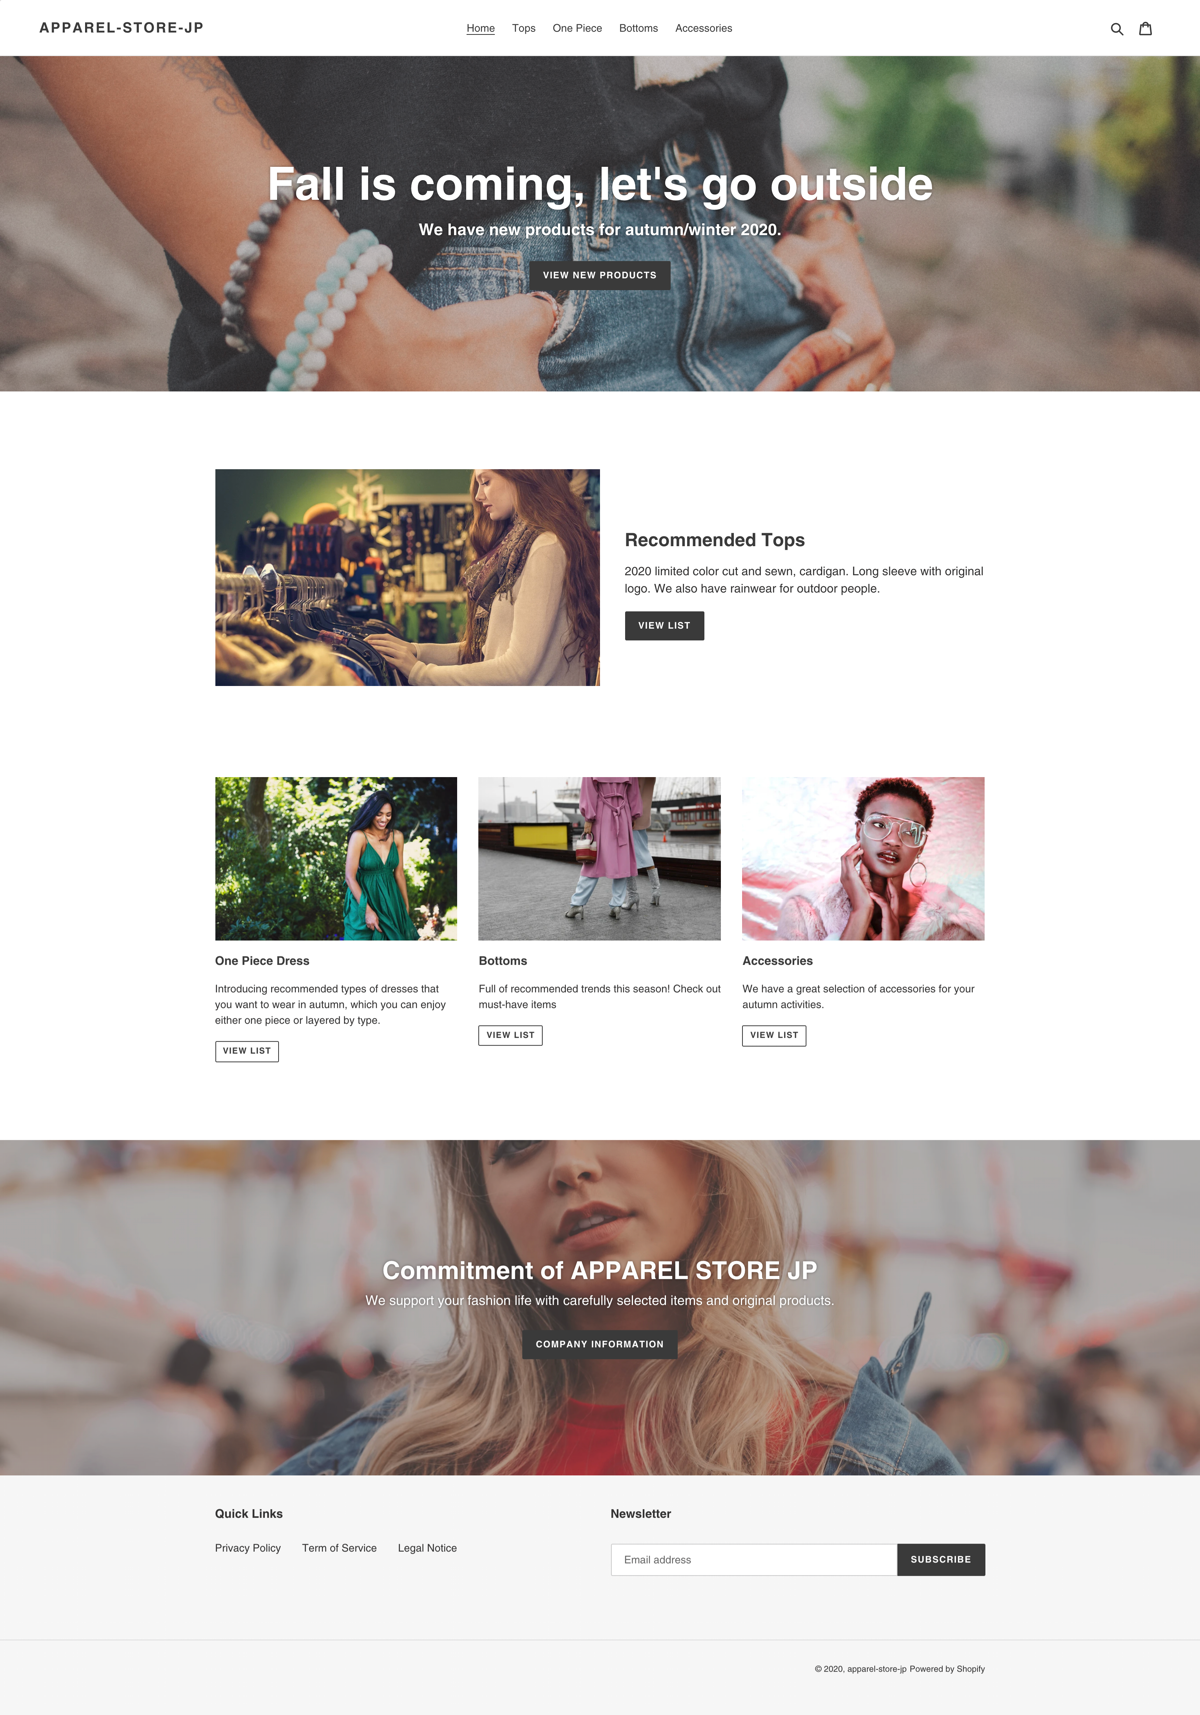
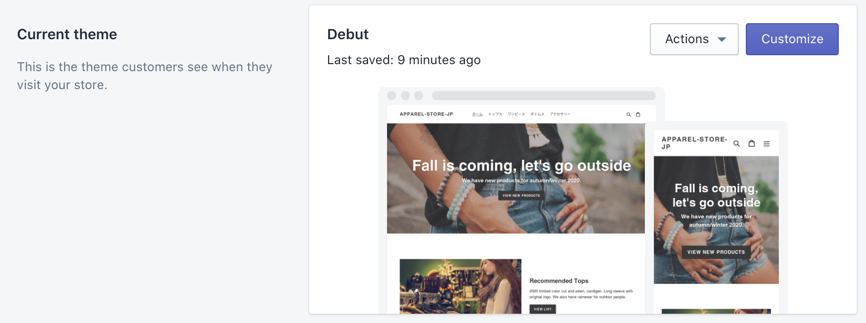
This time I am using the theme “Debut” which is installed by default when you create a store with Shopify.
Install translation app
Various translation apps have been released. This time, I will use an application called Interlingue. Interlingue provides the functions to fully utilize the multilingual API provided by Shopiy. In addition, it is designed to prevent conflicts with other apps and themes, so you can use it with confidence.
Install Interlingue from here. There is a 7-day free trial period.
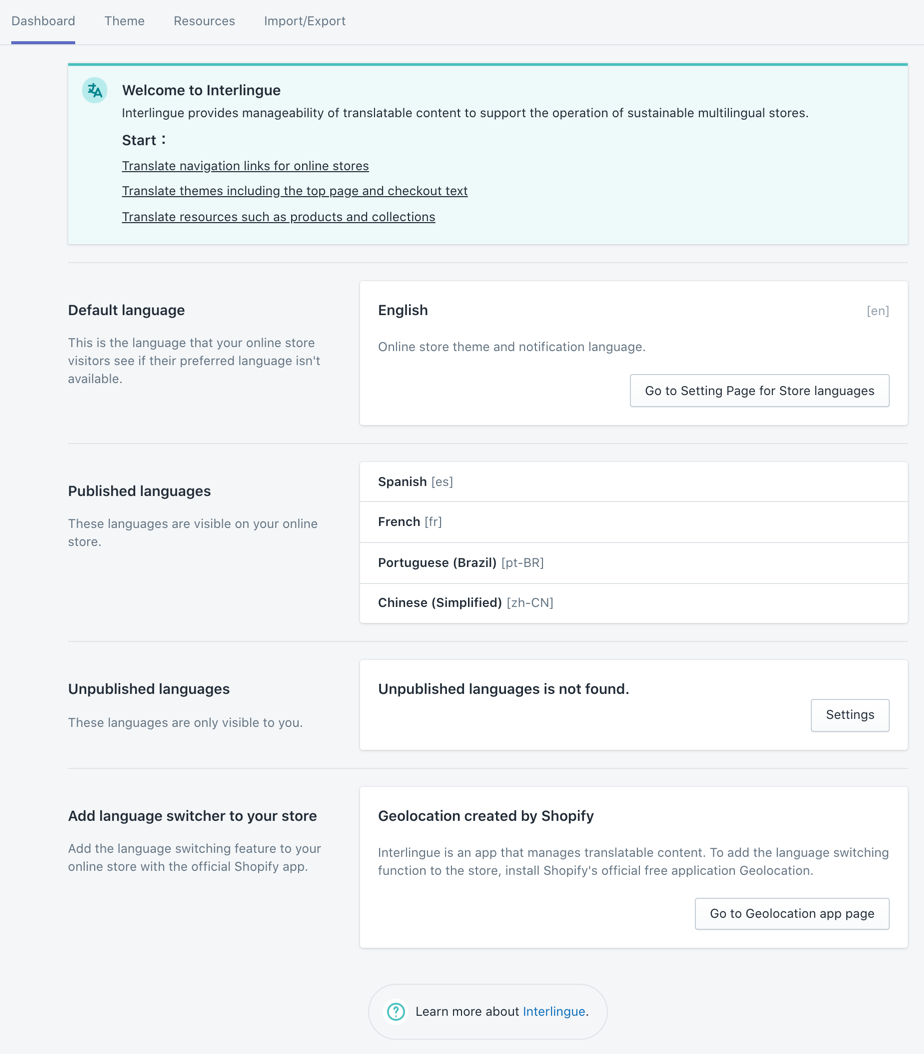
Store language settings
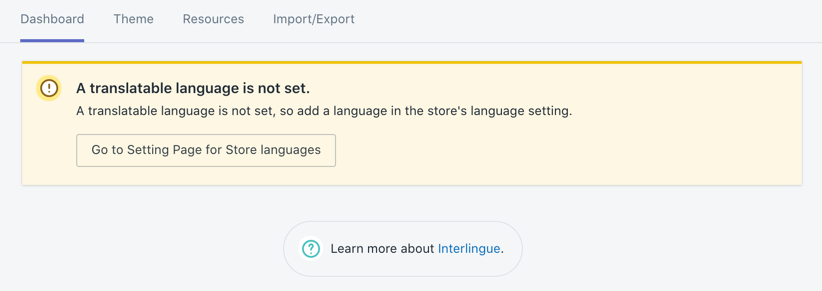
When Interlingue is installed, the dashboard will be displayed, but if the language of the store is not set yet, the following message will be displayed. In that case please click “Go to Setting Page for Store languages”. If you have already set the store language, proceed to the next step.
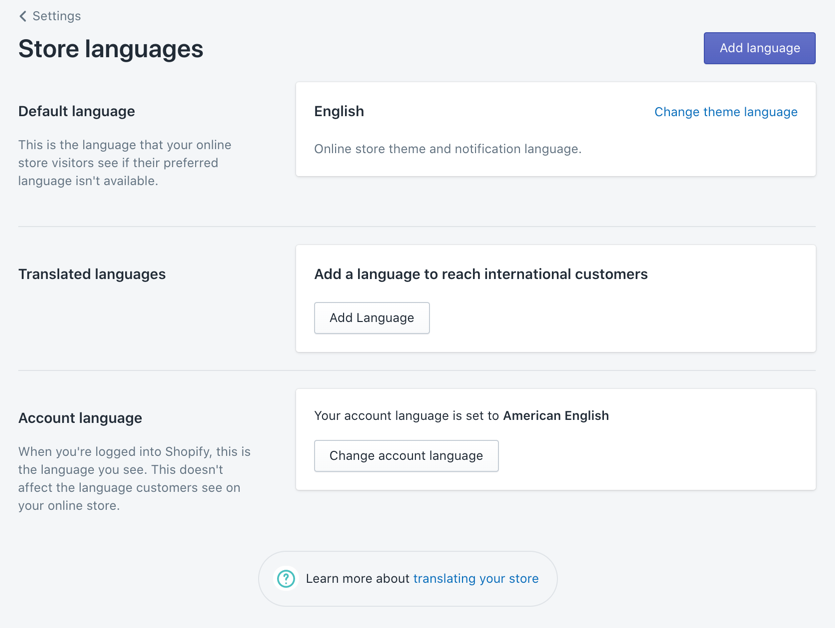
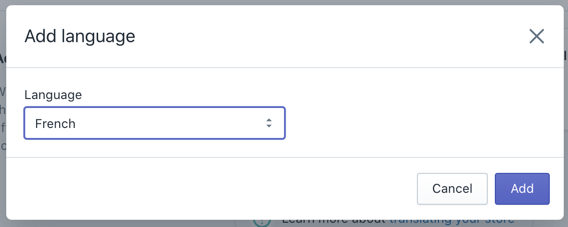
When the following screen is displayed, click “Add language”.
The “Add a language” dialog will be displayed. Select the language you want to translate from English (eg Spanish, French, etc.) and click “Add”.
For example, if French is added, the display will be as shown below. At the moment, the language has been added to the site but it is not published to customers.
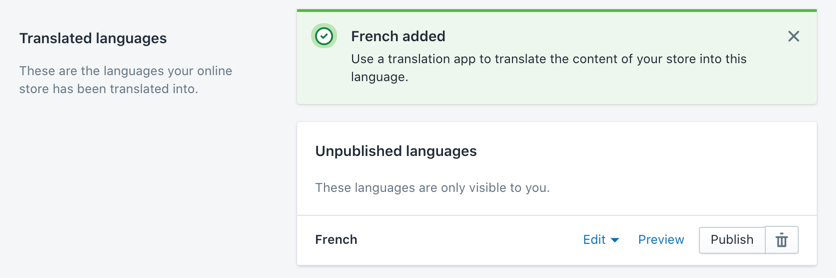
You can proceed with the translation in this state, but I want to proceed with the translation while checking the display on the site, so click “Publish” to make the language public.
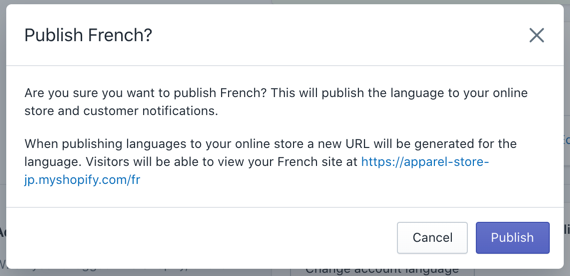
Confirm the dialog and click “Publish” again.

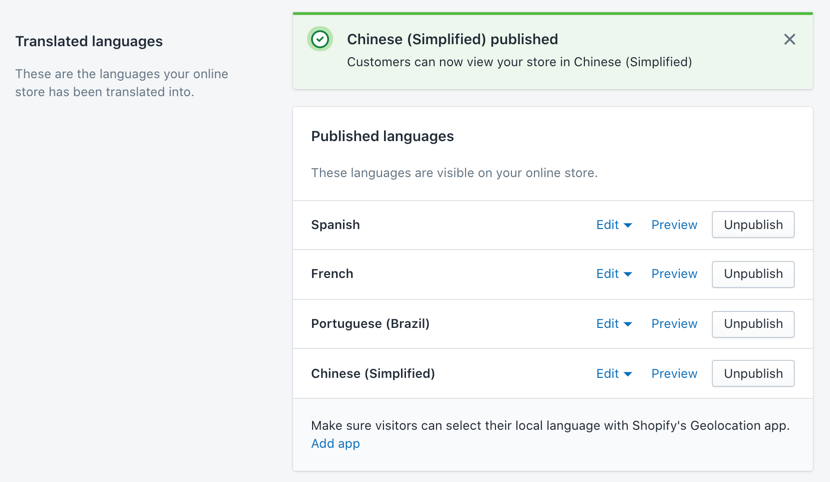
French is published. Add any language in the same way.
Four languages are set here: Spanish, French, Portuguese, and Simplified Chinese.
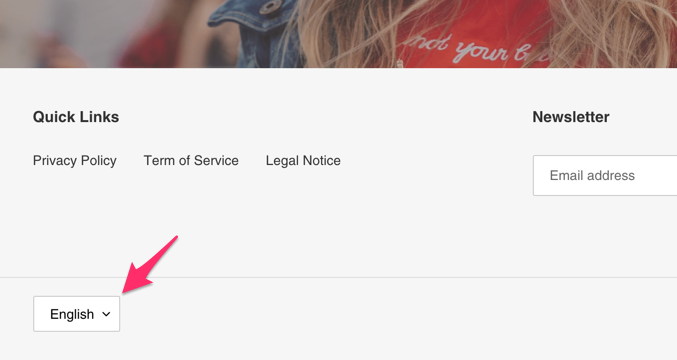
The theme “Debut” used this time has a language switching function as standard equipment, so if you check the site at this point, you can see that the following language switching pulldown has appeared in the footer area.
If you are using a theme that does not come standard with language switching, please install the GeoLocation app from this link.
Check here for more information about the GeoLocation app.
Translating the front page using Interlingue
Now, I would like to start translating with Interlingue.

Select Interlingue from the application management menu to display it.
The dashboard is displayed as above.
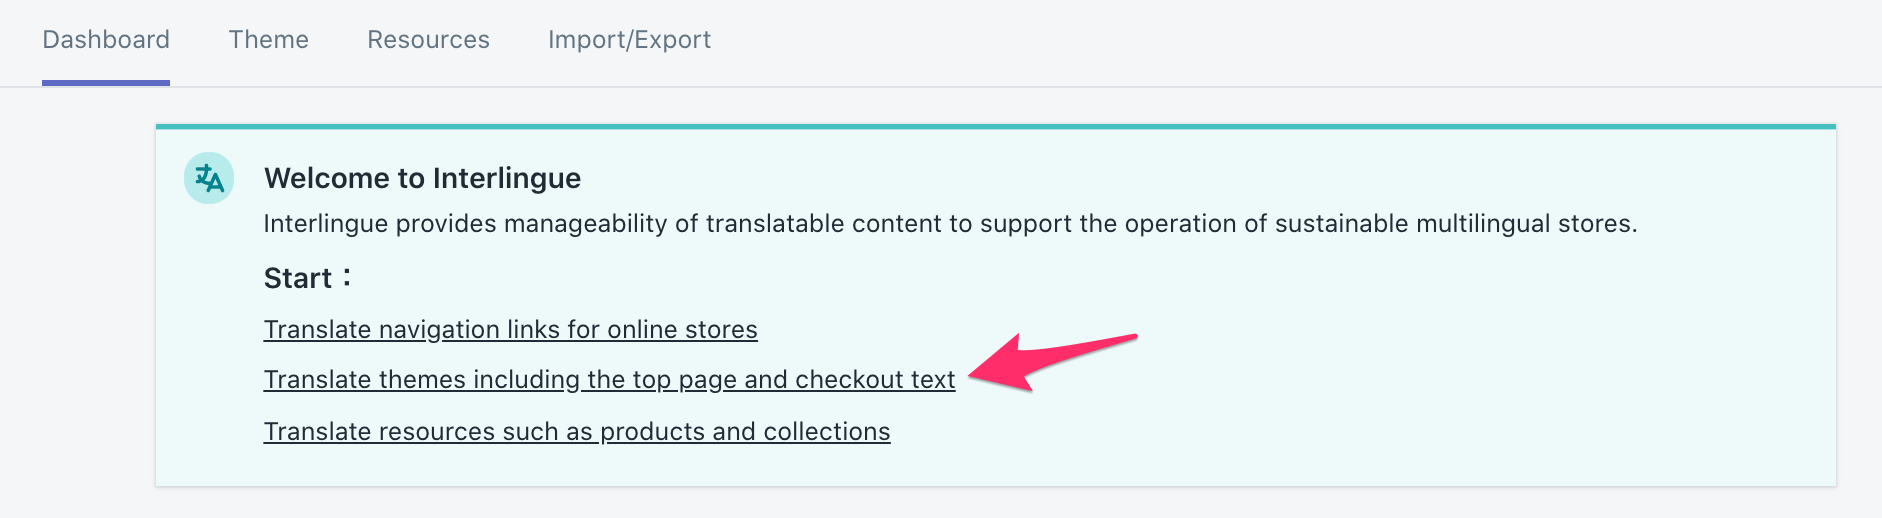
Click “Translate themes including top page and checkout text” at the top of the dashboard to move to Theme translation screen.
Then the following screen is displayed.
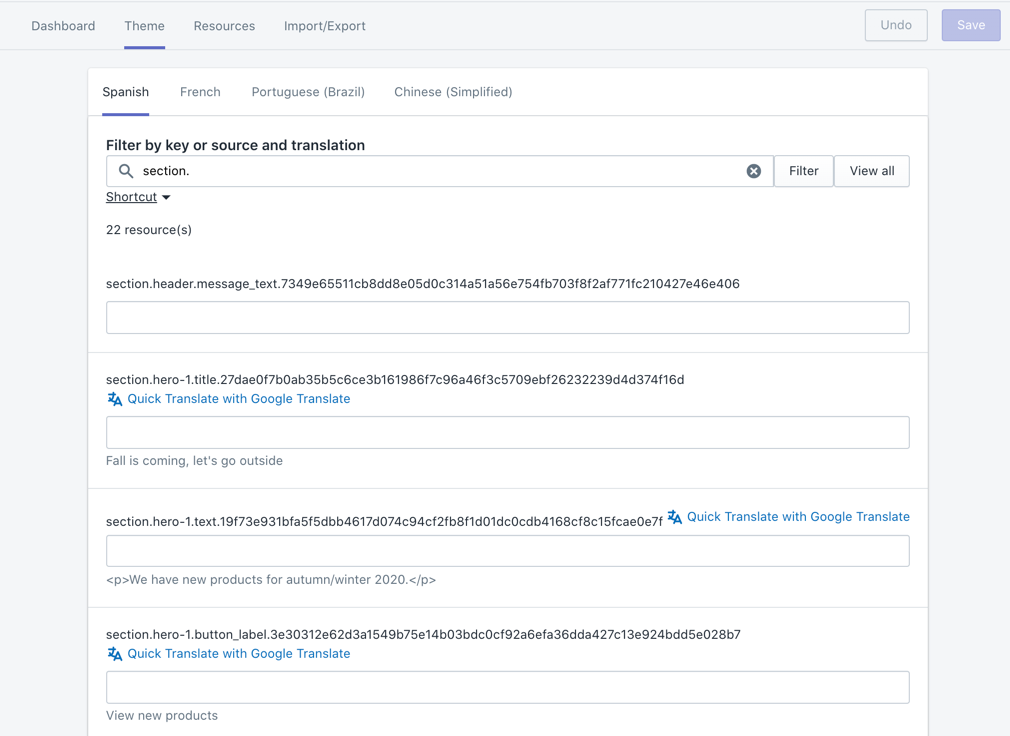
Select the target language in the language name tab at the top and register the translated content. Here I will translate it into Spanish.

For example, when translating the main visual “Fall is coming, let’s go outside”, enter the text you want to translate and press Enter. Then only the relevant content is displayed.
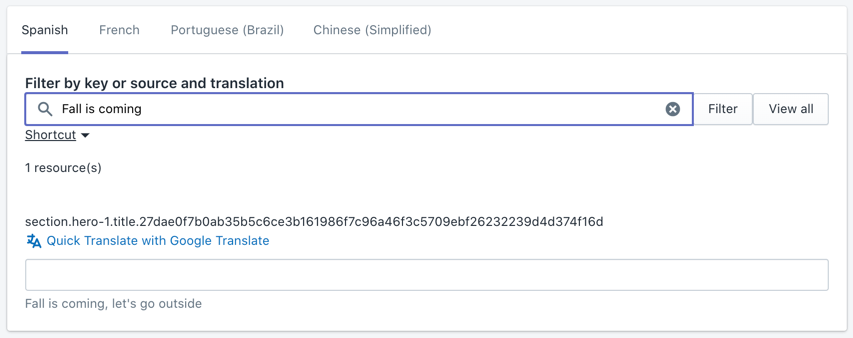
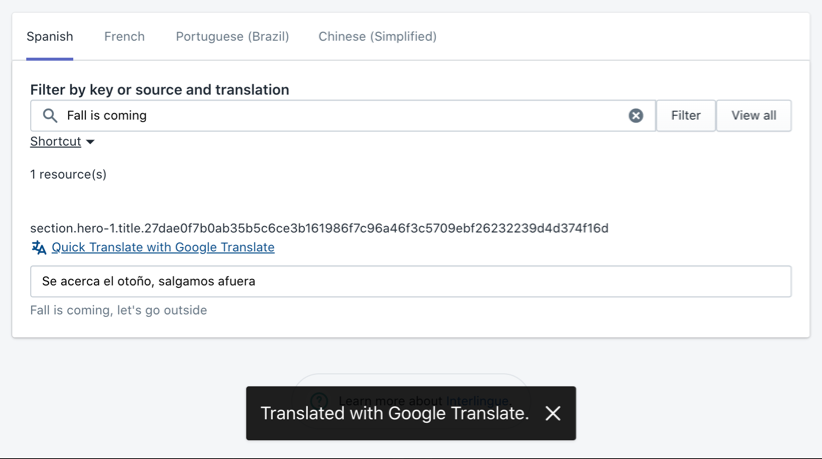
Enter the translated text in the text box. Or click “Quick Translate with Google Translate” and the result of Google translation will be entered in the text box.
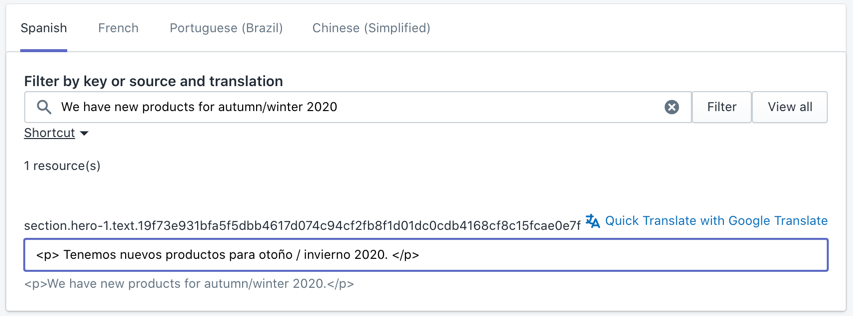
Similarly, translate “We have new products for autumn/winter 2020” and “View New Products”.
When the translation is complete, click Save to save the translation on Shopify’s server.
Let’s check the site.

Select Español in the language selection pull-down at the bottom of the page.

The text in the main visual has changed to Spanish!!
It’s very easy.
The procedure for theme translation such as front page in Interlingue is like this.
- In the “Theme” tab, enter the word you want to translate and filter
- Enter the translated text or click “Quick Translate with Google Translate”
- Save
Just repeat these steps.
Translation of navigation
Some of the display elements on the front page cannot be translated using the above procedure. It’s a navigation element.

On this site, ↑ this part,
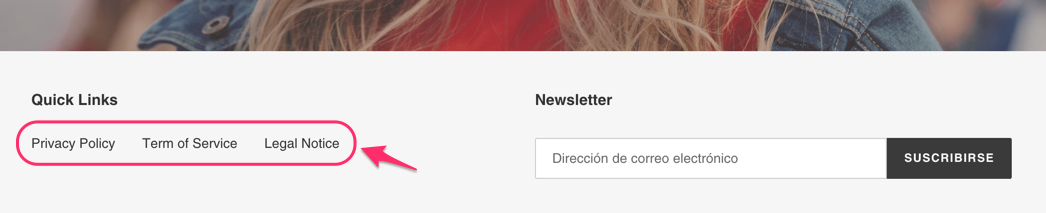
and, ↑ this part. These are managed as resources named “Navigation/Link” and will be translated differently. But the method is very simple,
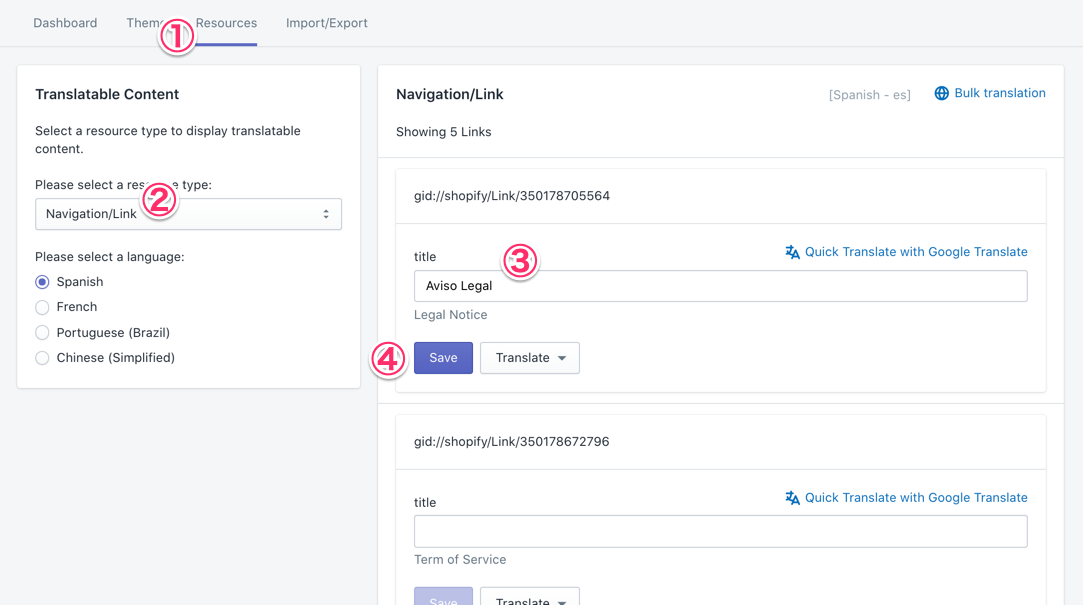
- Open the Resource tab
- Select “Navigation/Link” in resource type
- Enter the translated text or click “Quick Translate with Google Translate”
- Save
You can translate using the above procedure. Once the translation is complete, check the site again.
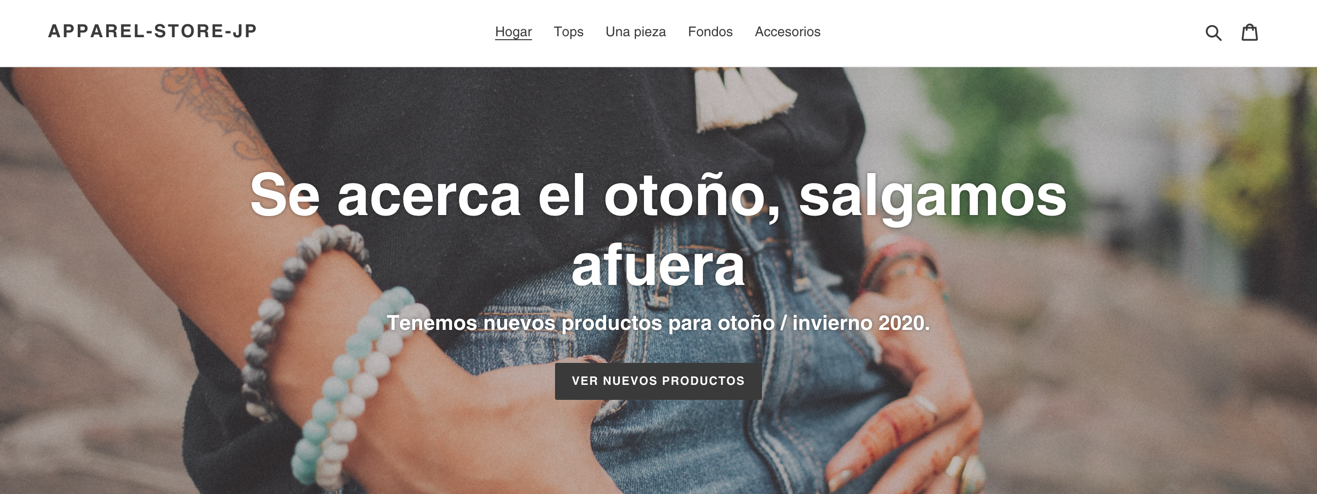
The navigation menu is now in Spanish!
Lastly,
The front page was translated using the method described above. When constructing a cross-border e-commerce site, it is also necessary to translate product data and blogs/pages. I would like to add each translation procedure and points to note when converting to multiple languages.
Please try to make your site multilingual using Interlingue! If you have any questions about using the app and find it difficult to use or want to improve it, we would appreciate it if you could contact us. We would like to make the app easier to use and help deliver your products to overseas customers.
Author: Takeshi @ Mixlogue inc.